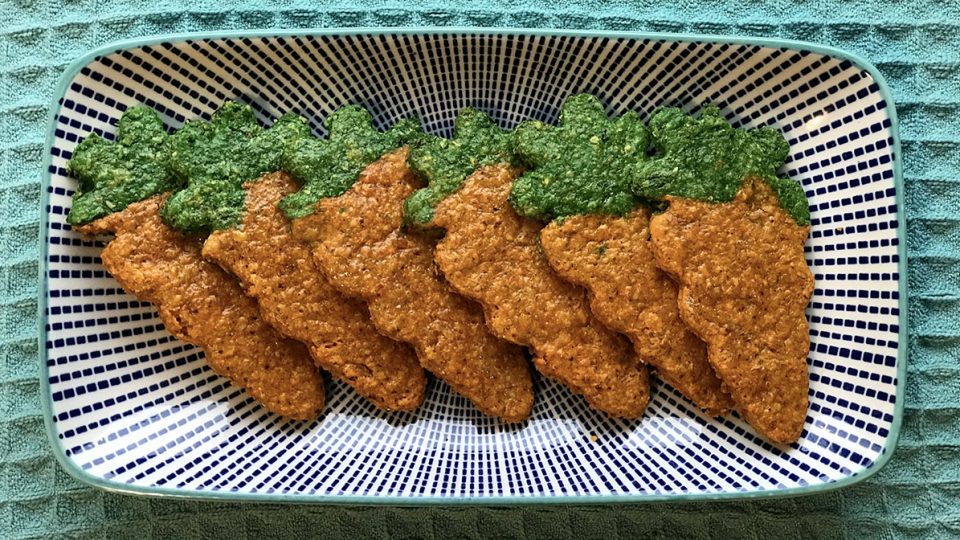
Your family will be impressed by how these dog-friendly Easter treats look—and your dog will love how they taste.
These colorful, carrot-shaped dog cookies may look tricky to make, but we break it down step-by-step for you in our exclusive recipe. They’re packed with healthy and delicious dog-safe ingredients like carrots, pumpkin, and parsley, and they make a great photo opp.

The Easter Bunny’s Carrot Cookies for Dogs
- Prep Time: 3 minutes
- Cook Time: 30 minutes
- Total Time: 33 minutes
- Yield: 24-36 Cookies 1x
- Category: Holiday Treats
Ingredients
- 4 cups flour (we used oat flour from rolled oats)
- 2 tbs flaxseed, pulverized (a clean coffee grinder is perfect for this)
- 4 tbs warm water
- 2 tbs melted coconut oil
- 1 cup canned, unsweetened pumpkin
- 1/2 cup finely chopped parsley
- 3/4 cup grated carrot
- Optional: natural food coloring
- Optional: milk or beaten egg for a shiny pastry wash
Equipment
- food processor
- rolling pin
- cookie cutter (we used this carrot shape)
- 2 parchment-lined sheet pans
- pastry brush
Instructions
Preheat oven to 350º and adjust the racks so you can easily manipulate 2 baking trays.
Pulverize flaxseed in a clean coffee grinder or with a mortar and pestle. Pop the flax in a small bowl and add warm water, stir, and set aside.
Blitz 4 cups of oats in the food processor until you get a nice flour consistency. Remove the oat flour to a large bowl and set aside.
Add the pumpkin, flax, and melted coconut oil to the food processor and pulse lightly to combine. Add the flour by cupfuls until dough ball forms.
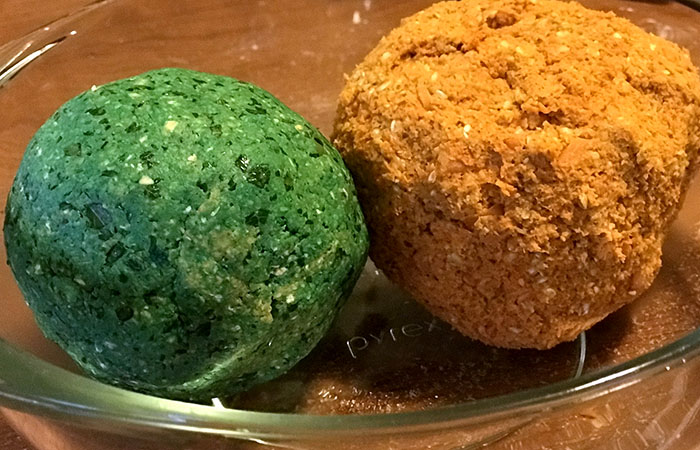
Split the dough ball roughly in two. About two-thirds of the dough will be orange carrot, and one-third will be for the green tops.
Place the largest dough back into the food processor, breaking it up into a few pieces around the bowl. Add the shredded carrot and orange food coloring, if using. Pulse lightly until combined and the color is evenly distributed. Remove to a clean bowl and place in the fridge. Rinse and dry the food processor bowl to remove coloring.
Place your roughly-chopped parsley into the food processor bowl, and pulse to pulverize. Add the smaller dough ball, breaking it into smaller pieces. Add food coloring if using. Pulse to combine until the parsley and food coloring are distributed evenly.
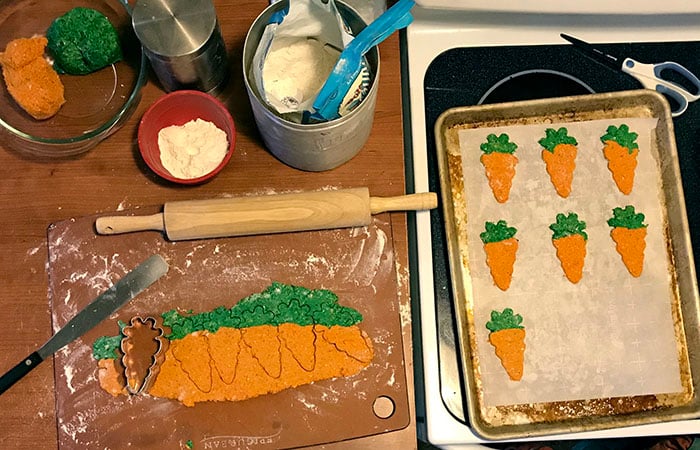
Now for the magic! Keeping our two-thirds orange to a one-third green color scheme, pull off a handful or so of your orange dough and roll into a log between your fingers. Work in small batches, since you’ll only be able to roll out a strip long enough for three or four cookies.
Do the same with the green dough, making a slightly thinner log. Lay the two piece out together on your floured board. Use your fingers to pinch the two together lightly, blending up and down just enough to hold together when you roll out the dough. Don’t aim for perfection. The natural variation in the line looks beautiful in your finished product.
Roll out the dough, using your cookie cutter as a guide to how big it should be. Focus on rolling across, as you will definitely need more length than height.
Cut out cookies, taking a moment to explore different placement options. Place cookies onto parchment-covered cookie sheets.
Bake the cookies for 15 minutes, then brush with either milk or a beaten egg for some shine, and rotate trays. Bake another 15 minutes or until most of the way crisp. Turn off the oven and leave cookies inside to dry out a bit more for a crunchy, long-lasting cookie.
