- Not a substitute for professional veterinary help.
Cats love to scratch, so you might think you don’t need to trim their nails. But it’s important to do so. Cutting your cat’s nails every 2-4 weeks helps protect your furniture, prevents accidental scratches, and keeps your cat’s paws healthy.
“It benefits everyone to keep your cat’s claws clipped,” says Joey Lusvardi, Certified Cat Behavior Consultant and founder of Class Act Cats.
We’ve talked to cat experts, vets, and a groomer to bring you easy tips and advice on how to safely trim your cat’s nails and improve your grooming skills.

How To Cut Cat Nails
If you’re not yet a pro at cat nail trims, there are a few things you can do to help make the process easier—on you and your cat. Being ready for each step ahead of time will help. Here’s what to do.
1. Gather supplies
First, make sure that you have all of your supplies ready to go. You’ll want:
- nail clippers
- treats
- pet towels or a blanket (if you want to try the Kitty Burrito approach)
- a partner (if you’re nervous or know this isn’t your cat’s thing)
Dr. Katy Miller, DVM and Educational Contributor at Pet Supplies Plus, especially recommends using lickable treats as a great way to distract your cat while you’re trimming.
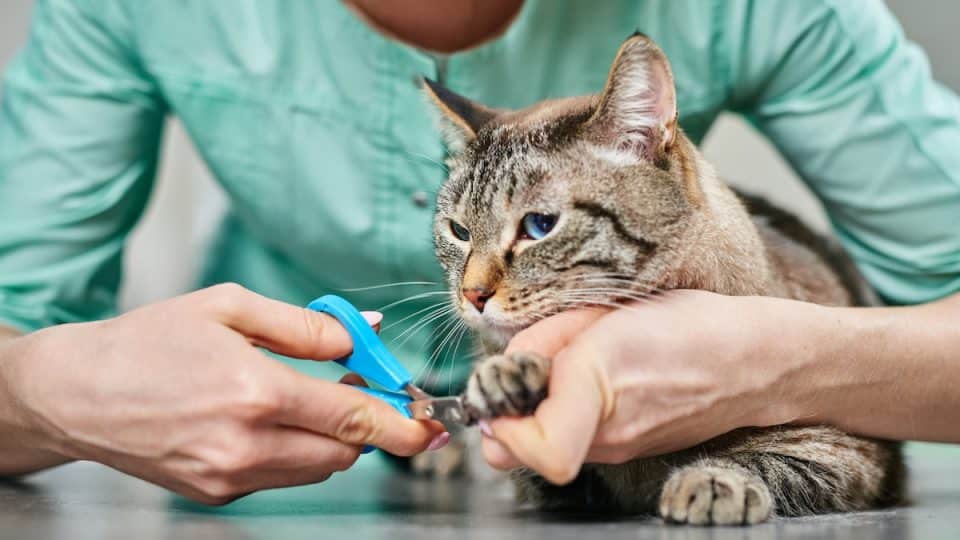
2. Pick a position
If you’re flying solo, there are a couple of positions that can help. Whichever you choose, make sure to hold your cat’s paw in your non-dominant hand so you can use your more skilled hand to do the trimming.
- The Lap Method involves sitting with your cat in your lap. For cats who are less interested in this activity, try having them sit with their back to your belly.
- The Kitty Burrito, as Dr. Miller calls it, is a popular method for cats who don’t enjoy nail trims. You’ll use a blanket or towel to swaddle your cat with only one paw exposed at a time.
If you have a nail-trimming buddy, designate one person as the “trimmer” and one person as the “squisher,” who will gently restrain the cat and feed treats as you go.
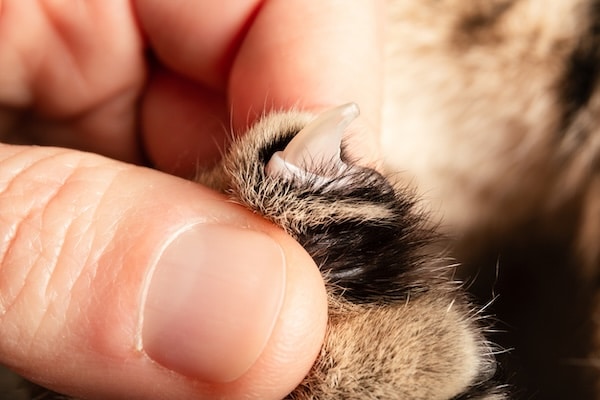
3. Press your cat’s toe beans to reveal the nail
Once your cat is in position, press down on the pads on the underside of their paw to reveal the nail. With the nail exposed, you should be able to see the quick, the darker-colored core that contains blood vessels and nerves.
4. Cut nails at a 45 degree angle
Trim just the tip of the curved nail, doing your best to cut at a 45-degree angle. This helps prevent splintering.
Give the quick a wide berth—and if you can’t spot it, as on cats with black nails, keep cuts very small.
5. Offer more treats
When you’re done, offer your cat yet more treats. Dr. Miller explains that offering a treat helps your cat form positive associations with nail trims. Over time, she says, some cats even come to like getting their nails cut.
satamedia via iStock
Tips for Cats Who Hate Nail Trims
If you have a spicy cat who gives nail trims a hard pass, there are a few tricks you can try to make the process easier.
1. Practice paw handling
Lots of cats are naturally protective of their paws. Rewarding your cat for tolerating paw touches (with no nail clippers in sight) can build a path to easier nail trims down the road. This kind of desensitization and counterconditioning training is especially helpful with kittens.
2. Go slow and take breaks
If your cat is spicy, you might be tempted to take nail trims in a rush—but Dr. Miller recommends going slow, even if that means that you have to wait a day in between paws. A gradual progress is a much better outcome than forcing a negative experience.
3. Offer a lot of treats
Treats are a great way to distract an anxious cat. If you’re having trouble holding both the cat and the snack, try spreading a treat or wet food on a lick mat. You can even get a lick mat that attaches to the wall with a suction cup, so your cat can stay in position while you work.
4. Try a cat bag
If you know that your cat is going to be sensitive about getting their nails done, Dr. Grant Little, DVM, recommends a cat bag. A cat bag is a fancier version of the Kitty Burrito, and it’s designed specifically to hold a cat through difficult activities like nail trims.
5. Consider calming tools
Soothing aids like calming treats, ThunderShirts, and pheromone diffusers can help relax a stressed kitty. Your vet can help you identify which kinds of calming tools would be best for your particular cat. For especially urgent trims, your vet might recommend a sedative.
6. Ask a professional for help
If you need help, ask your vet or a groomer for advice. Dr. Little notes that groomers often have tips for handling nervous cats calmly and confidently—and they’ve also developed expertise in cutting nails quickly.
How Often Do Cats Need Their Nails Trimmed?
As a general guide, cats need nail trims every two to eight weeks. Every cat is different, and their nail trimming needs can vary based on their activity levels and the surfaces they traverse.
For example, indoor cats, senior cats, and less active cats might need their nails trimmed every two to three weeks.
But kittens, active cats, and outdoor cats may only need nail trims every six to eight weeks. Dr. Miller notes that outdoor cats use their nails as their primary defense, so it’s important not to trim them too often.
Because cats will have different needs depending on age and activity, here are some good guidelines to tell if your cat might be ready for a trim:
- Your cat’s nails are clicking on the floor
- Your cat’s nails are catching on blankets
- Your cat is chewing on their nails
- Your cat is use scratching tools more than usual
For some cat parents, choosing to do mini nail trims more frequently can be helpful. It can help your cat get used to the process, and it can protect human skin and furniture from especially enthusiastic scratchers. In the long term, it can even improve your cat’s posture and mobility by keeping pressure off their pads.
Alternatives to Nail Trimming
If nail trims are a struggle, there are some good options to prolong the time between cuts. Dr. Miller recommends:
- Toys with textures. Sturdy scratching posts made from sisal, corrugated cardboard, or wood can help to keep your cat’s nails short and dull. Other textures, such as natural fiber rugs, wooden perches, or climbing towers can also provide surfaces and activities that naturally keep nails short and safe.
- A dremel. These rotary tools sand down your cat’s nails to make them shorter and smoother. These tools are a good solution for cats who dread the look and feel of the clippers—but the process of preparing and holding your cat for the activity will look the same.
- Nail caps. Cat nail caps are soft plastic or rubber caps that pet parents can glue to their cat’s nails to help blunt them. They’re designed to fall off naturally after four to six weeks, and they don’t prevent your cat from extending their claws or from the natural motion of kneading. They’re a safer way to prolong the time between trims, without the negative effects of declawing.
Still worried about cat nail trims? Get some help! Reach out to your vet or groomer, who will have lots of tips and can assist with even the most difficult of cases.