- This post contains affiliate links. Read more here.
I always get anxious trimming my dog’s nails. After a couple of too-close trims in the past, my dog and I are both nervous about handling his paws. And I’m lucky: my dog’s nails are light, with a visible quick. Trimming black nails can be even more stressful!
Trimming your dog’s black nails is nerve-wracking because you can’t see the quick (the inner nerve and blood vessel that nourishes the nail). However, with the right information and tools, trimming your dog’s black nails doesn’t have to be a trial. Read on to learn how to safely trim your dog’s black nails with less stress for the both of you.

Dog nail anatomy
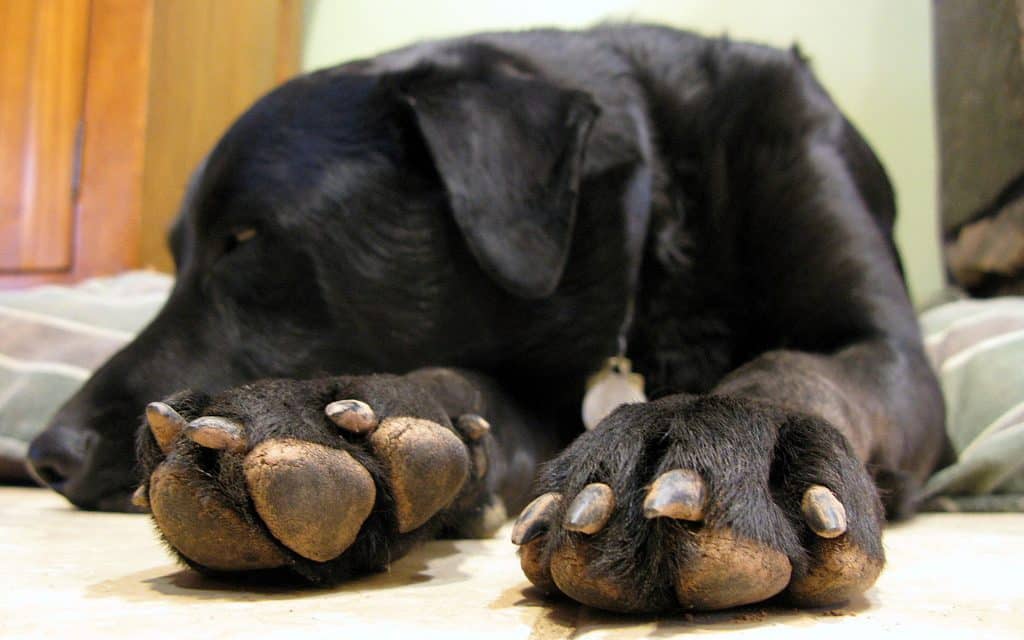
via flickr/oakleyoriginals
Your dog’s toenail is made up of two main parts. There’s the nail itself, which is a hard outer shell that grows similarly to human nails. And then there’s the quick, the inner cuticle of blood vessel and nerve. The nail itself doesn’t have nerve endings, so your dog shouldn’t feel anything when you trim it. However, the quick can cause pain.
When trimming your dog’s black nails, learning to avoid the quick will save you both a lot of stress.
Nail trimming tools
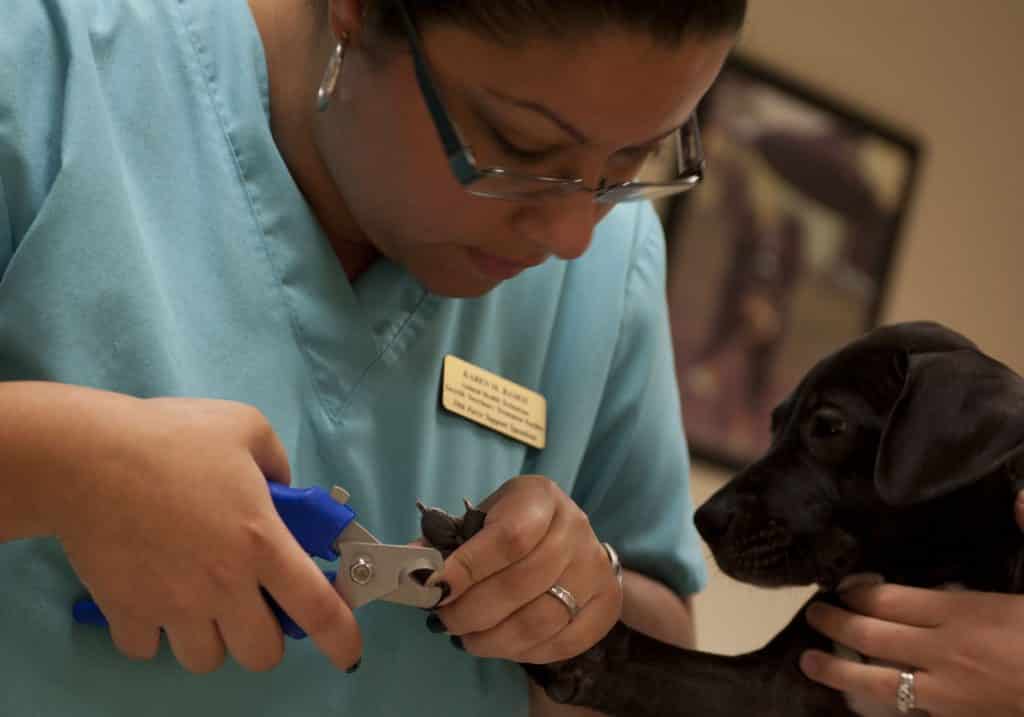
Via airforce medicine
There are two main styles of dog nail trimmers: scissor style and guillotine style. Which one you use is up to you. Scissor-style trimmers like these standbys can be easier to use, but guillotine-style trimmers like these are generally stronger and more precise. Both work equally well for black dog nails, so choose the one that suits you best.
Whatever type of trimmer you use, be sure to have styptic powder on hand. Styptic powder, also available in pencil form, quickly causes blood vessels to contract to slow bleeding. They also work for small nicks and scrapes, so it’s a good idea to have one in your doggy first aid kit.
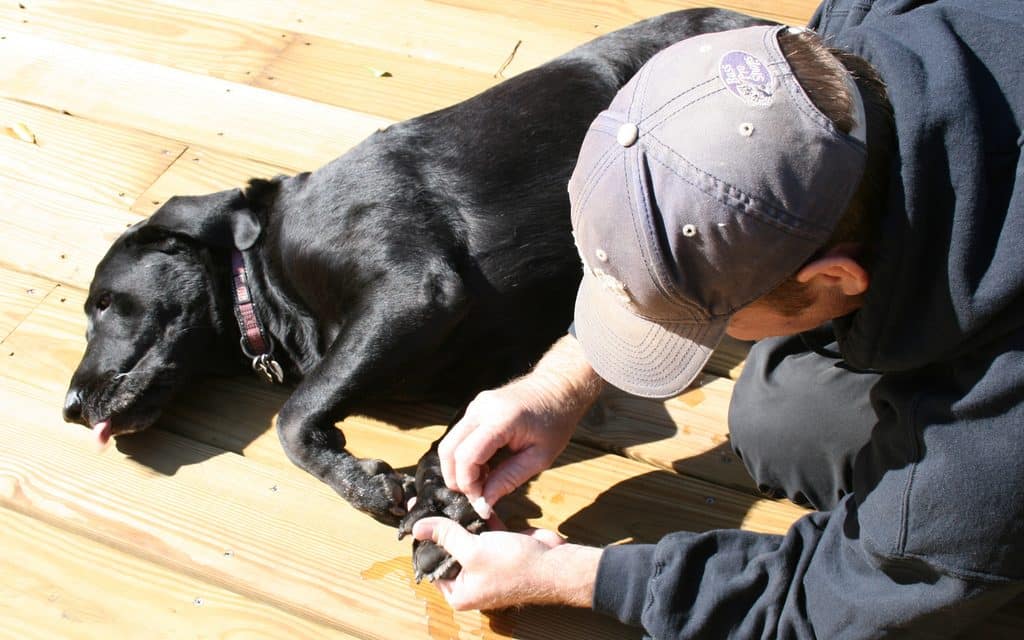
Trimming black nails

via flickr/aarontait
When trimming your dog’s black toenails, follow these guidelines:
- Go slowly
- Hold your dog’s paw firmly but gently
- Position the clippers to cut the nail from top to bottom (not side to side)
- Trim a very small length of the nail, about 1/16th of an inch
After you’ve made one trim, look at your dog’s nail head-on. If it appears whitish, you’re still in the “dead area.” It’s safe to trim a bit more into the nail.
Continue making very small cuts and looking at the end of your dog’s nail after each one. As you get closer to the quick, the center of the nail will appear black, and may eventually look pink right before the quick.
The trick is to trim a very short bit of nail at a time and stop as soon as the cut surface shows a black center. If you get to the pink, definitely stop!
What to do if you cut the quick
via flickr/oakleyoriginals
Even if you’re a practiced nail trimmer, accidents happen. If you nick your dog’s quick, apply styptic powder to stop the bleeding. If you don’t have styptic powder on hand, you can use corn starch or even a bit of flour. Cut quicks rarely require veterinary attention. Simply apply something to slow the bleeding, and be sure to give your dog lots of praise and treats.
If your dog is acting normal and doesn’t mind having their paws handled, you can continue trimming their other nails. However, if they are nervous or fearful, stop for the day. You can always try again tomorrow.
When to get help with dog nail trimming
Some dogs just can’t handle having their nails trimmed by their person. And some people simply find the whole process too stressful. That’s fine! Help is available.
Dog groomers are nail trimming pros, so you can always make an appointment for your pooch.
If your dog is truly fearful about having their nails trimmed and is at risk of injuring themselves in the process, call the vet. Your friendly vet techs will take care of the job safely and quickly, and you won’t have to be the bad guy with the clippers.